Concrete today - FINALLY1
Well, today was it! The countertops are poured and are resting comfortably in their molds. It is a huge relief. There were so many unknowns, so many things that could have gone wrong and so many things that had to come together to make this happen. Today was only a 10+ hour day, unlike our customary 12+ hour days when working on concrete. C and I got some desparately needed sleep and started late morning by finishing the last of the molds and tarping. His parents joined us at 2:00, and at 2:30 we put a test batch in the mixer.
We did the concrete for the countertops in two batches because the mixer couldn't hold it all. The first batch was a little dry, and there were a few problems with it setting up before it could be properly finished. The second batch was perfect (C gets the credit for this - he did a great job at the mixer).
Once each batch was done, we quickly ran it in buckets and dumped it into the molds while two of us worked the concrete into all the nooks and crannies. We also had to continuously vibrate the mold by tapping it with a hammer. This works out the air bubbles. Once this happens, I used a long level to level it out. C worked on setting the granite inlay just right (another great job!). Then came the troweling. The DIY book we worked from talked about troweling until the surface was rock hard and gave at time estimate of 3 hours. I personally troweled for 4 1/4 hours, and everyone else troweled for about 2 1/2. I was the last person to touch the surface so it looked consistent and because I had practiced the specific techniques in the book.
The idea behind the troweling is that you push down the aggregate and bring up a "butter" of pigment, fine dust and water. The troweling spreads the butter around and the surface gets really smooth. It is a lot like trying to frost a cake and not leave knife marks. The troweling is really strenuous - you have to push down really hard on every stroke, and every stroke needs to be a long, sweeping motion. It is really hard to generate such force on the back of the counter and in the far corners when you can barely reach them. I was sweating and my heart was pounding!
I finally called it quits on the troweling at 9:30 p.m. Once the material reaches a certain hardness, any more troweling will make it look worse so you have to stop. Thank goodness! It is so easy to get all obsessive and perfectionist about it. We had one final job to do, which was ready the mixer for return tomorrow (we had already cleaned it out). C and I had to turn it around in the driveway, back the truck in and hook up the tow hitch. Sounds easy, huh? Well, first of all, the mixer weighs more than a mastodon and is probably more resistant to being moved. I think I summoned up my inner Sumo wrestler and we managed to get it turned around. (Note to self: next time, back the truck in with the mixer so it is facing the correct direction on the way out. This will also save lugging the beast uphill up the driveway).
Next, we tried to lift the front of the mixer to put it on the tow hitch, and since it was a vertical lift we got it just a few inches up. (Note to the rental company: you really should provide the dolly you used when you so easily moved the mixer around your yard). C had a brilliant idea of using a long 2x4 as a lever and that did the trick. We were able to get the mixer's tow connection onto the trucks tow hitch. We thought we were home free, but then we couldn't lower the handle to lock the connection in place. After fooling with it for a while, I ended up laying down in the driveway that was wet with water and two colors of concrete sludge. Yep, I layed down flat on my back in the muck to look at the underside of the tow hitch. What fun at 10:00 at night after a long day. Not that it made much difference - my face, hands, arms and clothes were filthy and crusted with concrete. If figured out what the problem was (the mixer was uphill from the truck) and we were able to fix it.
We still weren't home free though. Somewhere in the process, we lost the nut to the bolt used to lock the hitch in place. We had it one second, and then not the next. I crawled all over the ground and we checked pockets and all the places it might have been set down. But no luck. We finally agreed to pay whatever fee they wanted for the nut (15 cents?) and used a remesh wire to secure it. Then I backed the truck with the mixer attached into the driveway and we were finally done. The concrete looks great, but the house and yard are TRASHED!
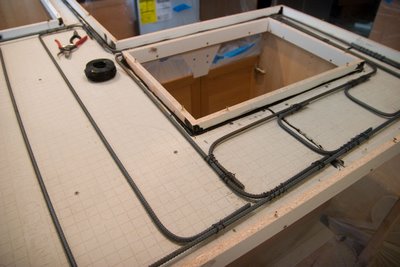
Here is the rebar that reinforces the countertop. There is an overhand at the end that is near the front of the picture, so this part of the countertop is all rebar reinforced.
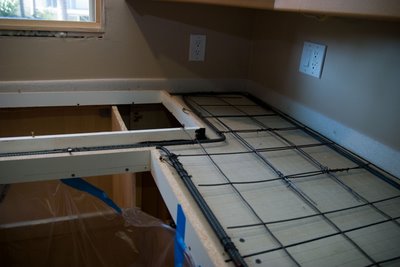
 This part of the countertop is fully supported by cabinetry, so we used the less-strong remesh here.
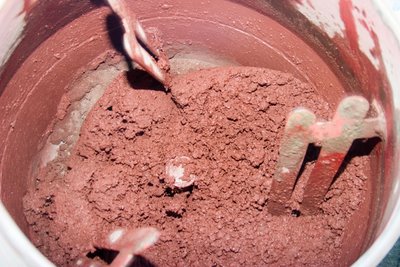
Here is the concret in the mixer. It is actually a deeper shade of wine or reddish-brown than it looks here.
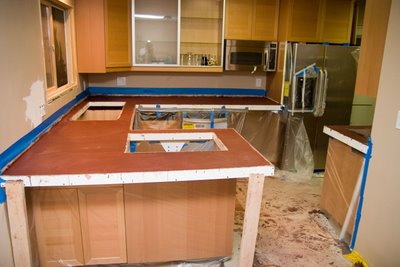
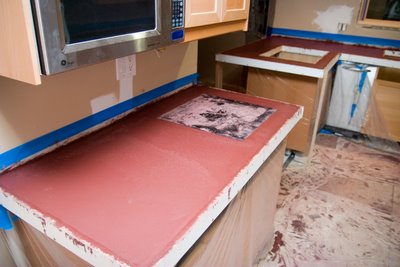
 Here is the finished product. It will stay in the molds for a few days, then we'll grind and polish. The cutouts are for the cooktop (foreground) and sink (back left).
  This is the inlaid granite tile. The pinkish film on the top will come off with water.
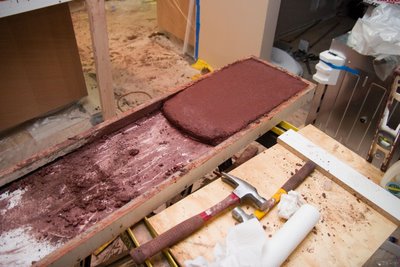
  This is a pan of brownies. Only kidding - this is extra concrete which we put in one of the molds we used for samples. It is a great way to have extra concrete on hand for patching (it will be at the same level of dryness that the countertop is) and it will give us a practice piece so we can decide how much to grind.

0 Comments:
Post a Comment
<< Home