Tuesday, October 31, 2006

1st shot at grinding today

Today I took my first shot at grinding the countertop. We had to buy a wet/dry grinder which is like a heavy-duty orbital sander with a water feed in the center. It uses diamond pads to smooth and level the surface.

It was quite a job! Because of the water, the kitchen has to be tarped watertight. This alone takes about 2 hours. Then the grinding goes quite slowly because I could grind for a few minutes and then I had to stop and remove the water with a squeegie. But the results are good! The trowelling bought up a layer of "cream" on top which has a lot of dye so the countertop had a pinkish appearance as opposed to a wine colored appearance which is what we want. As I ground, the dye layer disappeared and a more wine colored layer showed up along with some of the aggregate. So far, so good.

Here is a shot of the countertop after my grinding effort. The right is where I ground. It is still wet, but it is closer to the final color of the countertop.


Here is a shot where you can just begin to see the tiny flecks of white in the countertop. These are the pebbles in the concrete.

Sunday, October 29, 2006

A real day off!

Today we actually took a day off for the first time in about 4 weeks, including weekends. It was much needed, and I felt much better about the house by the end of the day.

Saturday, October 28, 2006

Home Depot today

Today we demolded the concrete, which was a big relief. We were very concerned about how the sides and edges would look and it turns out they look great. The samples we did had very crumbly sides and edges, so were were concerned. Other than a few air bubbles, which is normal, the sides looks great. The edges are strong and will handle being shaped by the grinder. Yay!

We made another Home Depot run to get supplies for the grinding. Everything took so long that even working until 10:00 p.m., we were not able to start grinding. Believe it or not, we used to be fun people who actually had a life.

Tuesday, October 24, 2006

Concrete continues to set

We're both feeling better today, but not totally recovered. I began the arduous task of cleaning up. It made an improvement, but didn't get anywhere near cleaned up.

This is a shot of the concrete that shows it drying. It looks very pink due to the troweling process. The aggregate gets pushed down and the dye tends to come up so the top layer has a lot of color. It looks pinkish now, but once we grind it down it will be more wine colored.


Monday, October 23, 2006

There's a reason it's called "sweat equity"

Except maybe sweat equity should be called "blood, sweat, tears, soul and social life equity" because that's what it costs you. Today, both of us are exhausted and sore, my hands are torn up, and the house and yard are a mess. After three days of about 12 hours each, I am barely functioning and cannot even begin to tackle the mess. Just putting my shoes on was work! I'm sore in muscles that I don't even know how to use, and it's getting worse as the day progresses. My hands, in addition to being sliced up, are really sore. You would not believe how many different muscles you have in your hands. I now know why people who work with their hands have large, noticeably muscled hands.

On a plus note, the countertop looks great. C and are in low gear (not completely off) for a few days of recovery. There has been too many weeks in a row with not one day off and too many long days in a row.

Since there is no place to put anything down in the kitchen, making a meal is a juggling act. Here is where I spilled my lunch while trying to balance it in one hand.


Here is the already stained, cracked, weedy, gross looking driveway which is now a bit worse due to having two colors of concrete dye spilled on it. We're going to have it resurfaced at some point.


I was able to trowel the top so smooth that it actually reflects light without even being polished.

Here is one of the many buckets of sludge laying around. We'll dispose of the solid matter once the wated evaporates.


The floor is covered with dust, pebbles and concrete remnants.

Sunday, October 22, 2006

Concrete today - FINALLY1

Well, today was it! The countertops are poured and are resting comfortably in their molds. It is a huge relief. There were so many unknowns, so many things that could have gone wrong and so many things that had to come together to make this happen. Today was only a 10+ hour day, unlike our customary 12+ hour days when working on concrete. C and I got some desparately needed sleep and started late morning by finishing the last of the molds and tarping. His parents joined us at 2:00, and at 2:30 we put a test batch in the mixer.

We did the concrete for the countertops in two batches because the mixer couldn't hold it all. The first batch was a little dry, and there were a few problems with it setting up before it could be properly finished. The second batch was perfect (C gets the credit for this - he did a great job at the mixer).

Once each batch was done, we quickly ran it in buckets and dumped it into the molds while two of us worked the concrete into all the nooks and crannies. We also had to continuously vibrate the mold by tapping it with a hammer. This works out the air bubbles. Once this happens, I used a long level to level it out. C worked on setting the granite inlay just right (another great job!). Then came the troweling. The DIY book we worked from talked about troweling until the surface was rock hard and gave at time estimate of 3 hours. I personally troweled for 4 1/4 hours, and everyone else troweled for about 2 1/2. I was the last person to touch the surface so it looked consistent and because I had practiced the specific techniques in the book.

The idea behind the troweling is that you push down the aggregate and bring up a "butter" of pigment, fine dust and water. The troweling spreads the butter around and the surface gets really smooth. It is a lot like trying to frost a cake and not leave knife marks. The troweling is really strenuous - you have to push down really hard on every stroke, and every stroke needs to be a long, sweeping motion. It is really hard to generate such force on the back of the counter and in the far corners when you can barely reach them. I was sweating and my heart was pounding!

I finally called it quits on the troweling at 9:30 p.m. Once the material reaches a certain hardness, any more troweling will make it look worse so you have to stop. Thank goodness! It is so easy to get all obsessive and perfectionist about it. We had one final job to do, which was ready the mixer for return tomorrow (we had already cleaned it out). C and I had to turn it around in the driveway, back the truck in and hook up the tow hitch. Sounds easy, huh? Well, first of all, the mixer weighs more than a mastodon and is probably more resistant to being moved. I think I summoned up my inner Sumo wrestler and we managed to get it turned around. (Note to self: next time, back the truck in with the mixer so it is facing the correct direction on the way out. This will also save lugging the beast uphill up the driveway).

Next, we tried to lift the front of the mixer to put it on the tow hitch, and since it was a vertical lift we got it just a few inches up. (Note to the rental company: you really should provide the dolly you used when you so easily moved the mixer around your yard). C had a brilliant idea of using a long 2x4 as a lever and that did the trick. We were able to get the mixer's tow connection onto the trucks tow hitch. We thought we were home free, but then we couldn't lower the handle to lock the connection in place. After fooling with it for a while, I ended up laying down in the driveway that was wet with water and two colors of concrete sludge. Yep, I layed down flat on my back in the muck to look at the underside of the tow hitch. What fun at 10:00 at night after a long day. Not that it made much difference - my face, hands, arms and clothes were filthy and crusted with concrete. If figured out what the problem was (the mixer was uphill from the truck) and we were able to fix it.

We still weren't home free though. Somewhere in the process, we lost the nut to the bolt used to lock the hitch in place. We had it one second, and then not the next. I crawled all over the ground and we checked pockets and all the places it might have been set down. But no luck. We finally agreed to pay whatever fee they wanted for the nut (15 cents?) and used a remesh wire to secure it. Then I backed the truck with the mixer attached into the driveway and we were finally done. The concrete looks great, but the house and yard are TRASHED!

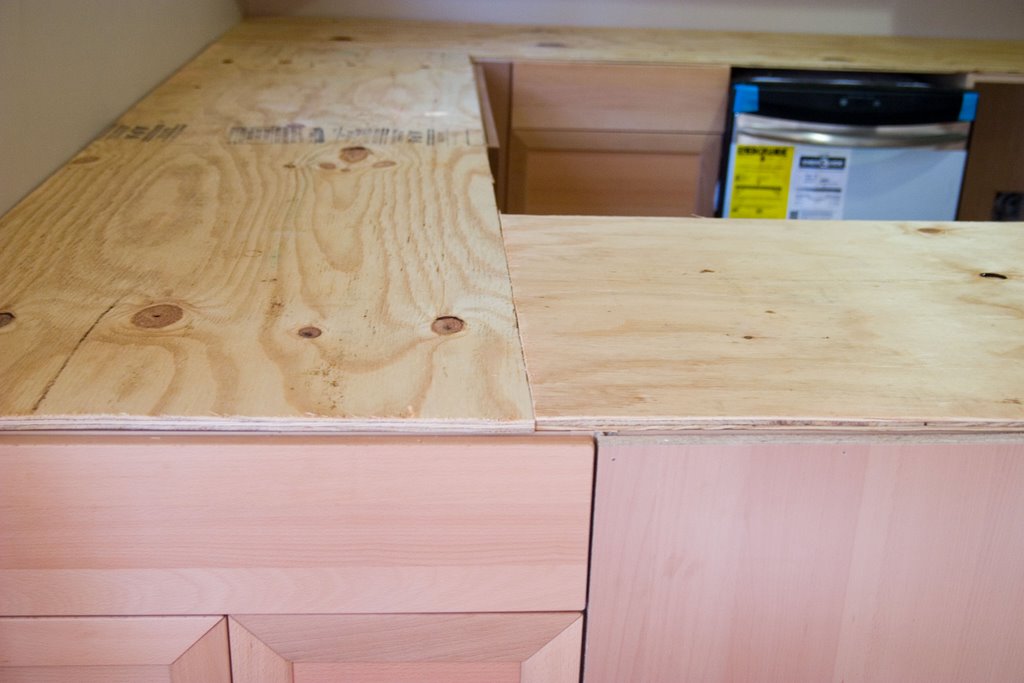
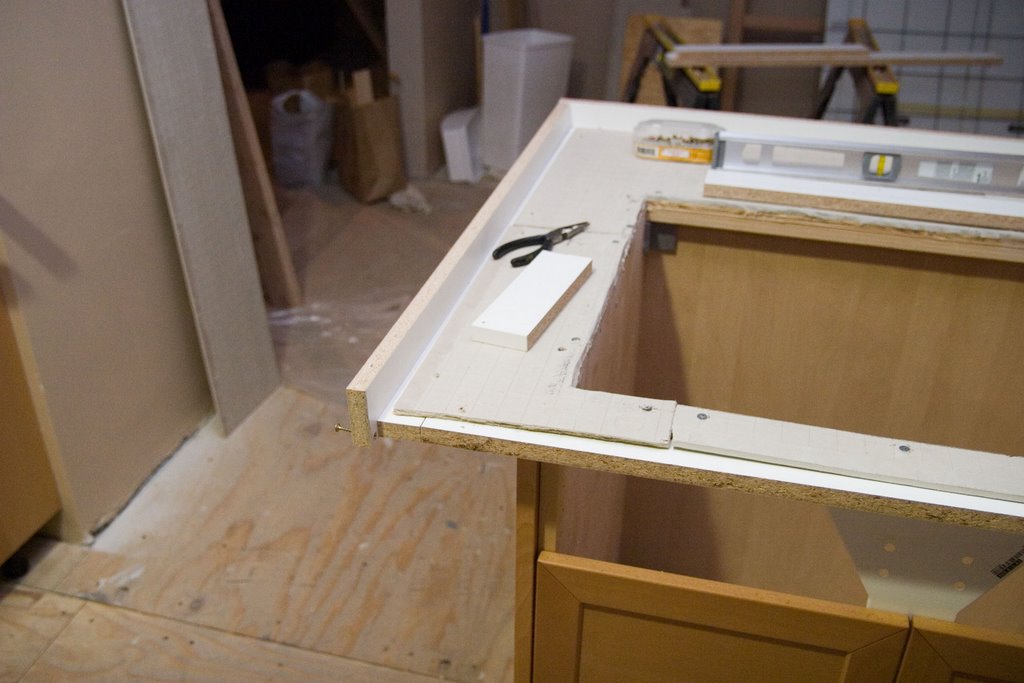
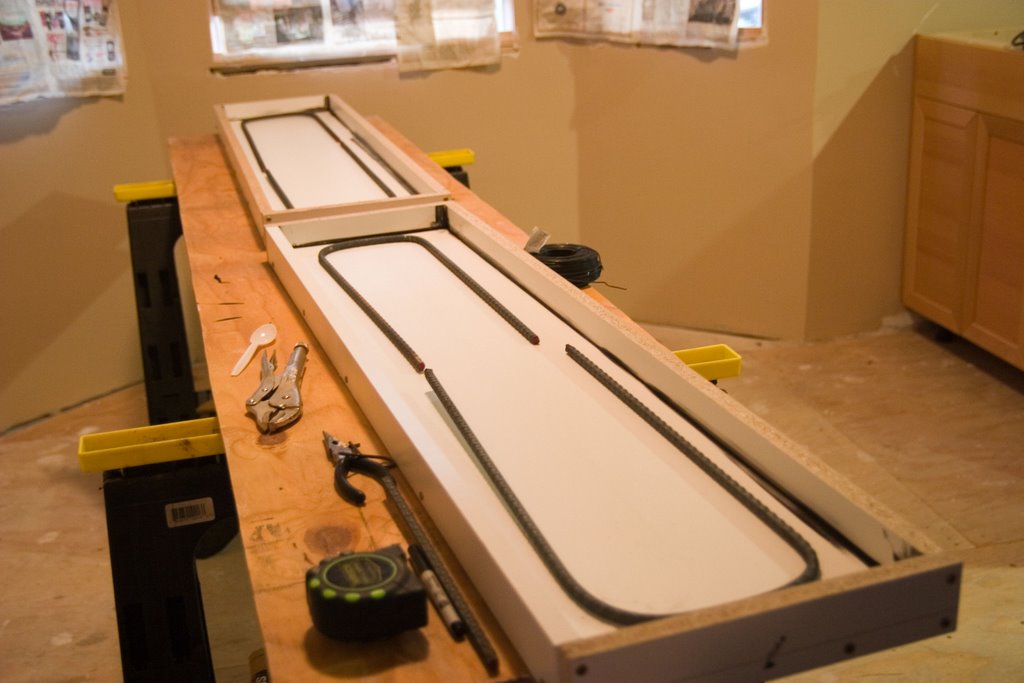
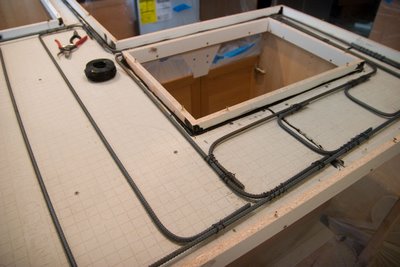
Here is the rebar that reinforces the countertop. There is an overhand at the end that is near the front of the picture, so this part of the countertop is all rebar reinforced.


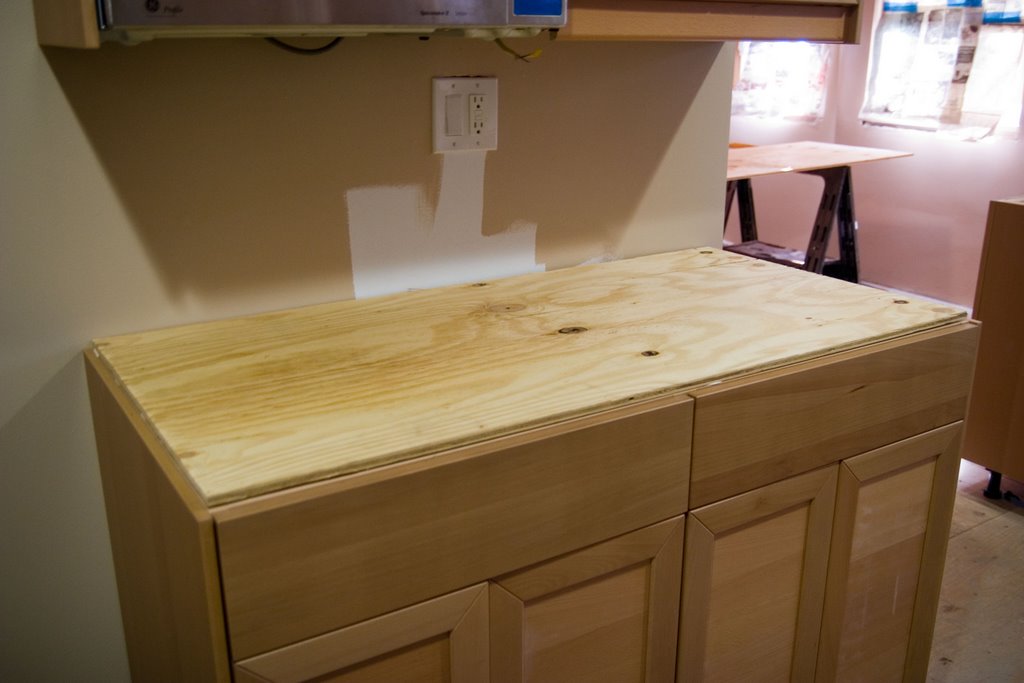
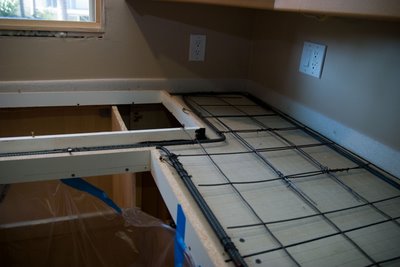
This part of the countertop is fully supported by cabinetry, so we used the less-strong remesh here.


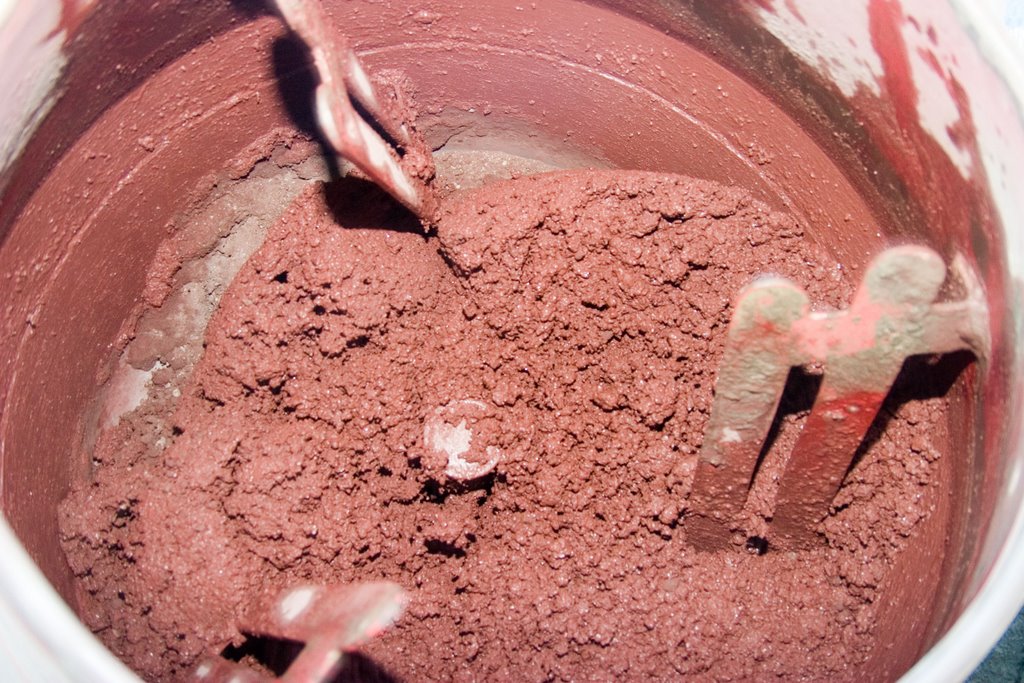
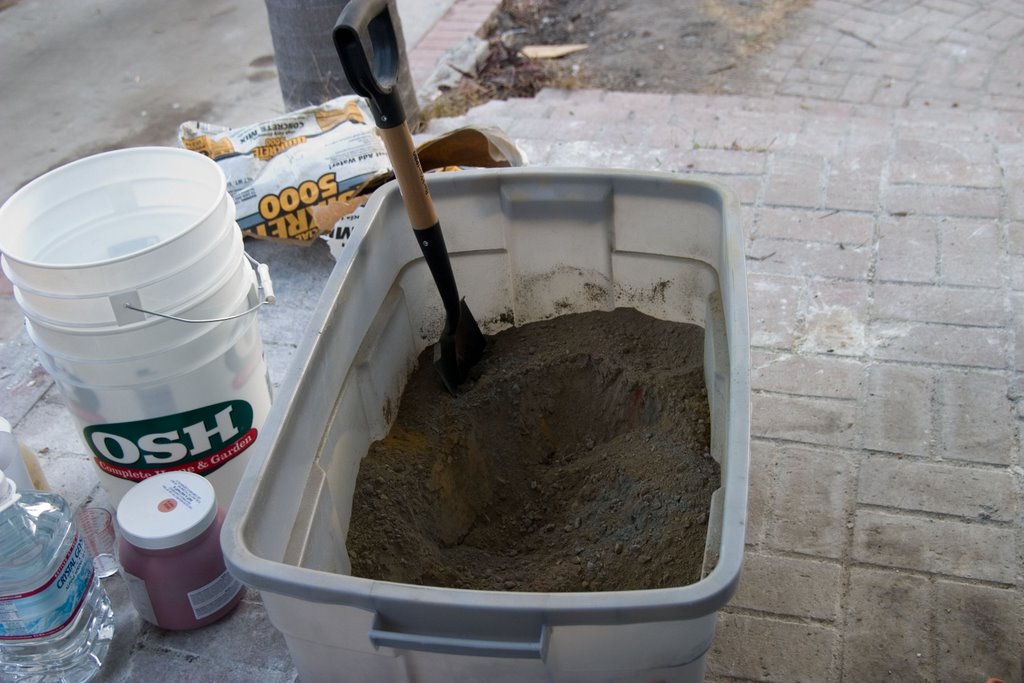
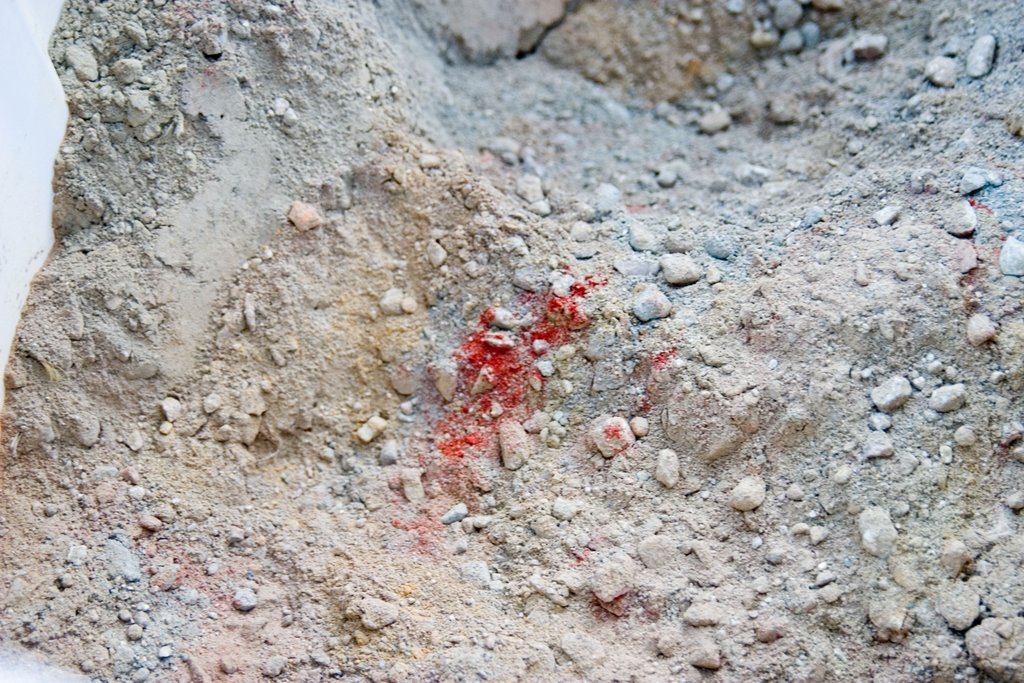
Here is the concret in the mixer. It is actually a deeper shade of wine or reddish-brown than it looks here.


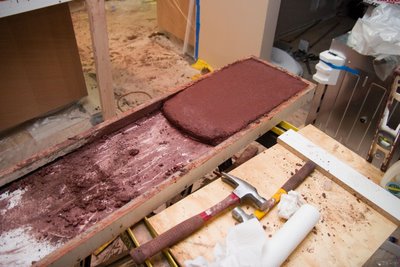
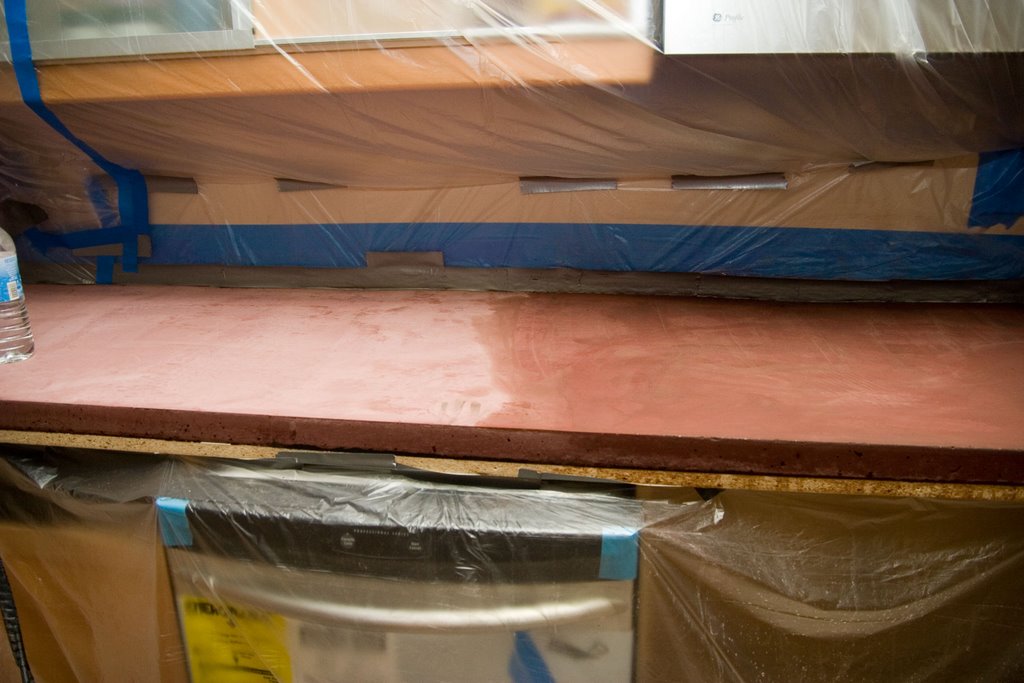
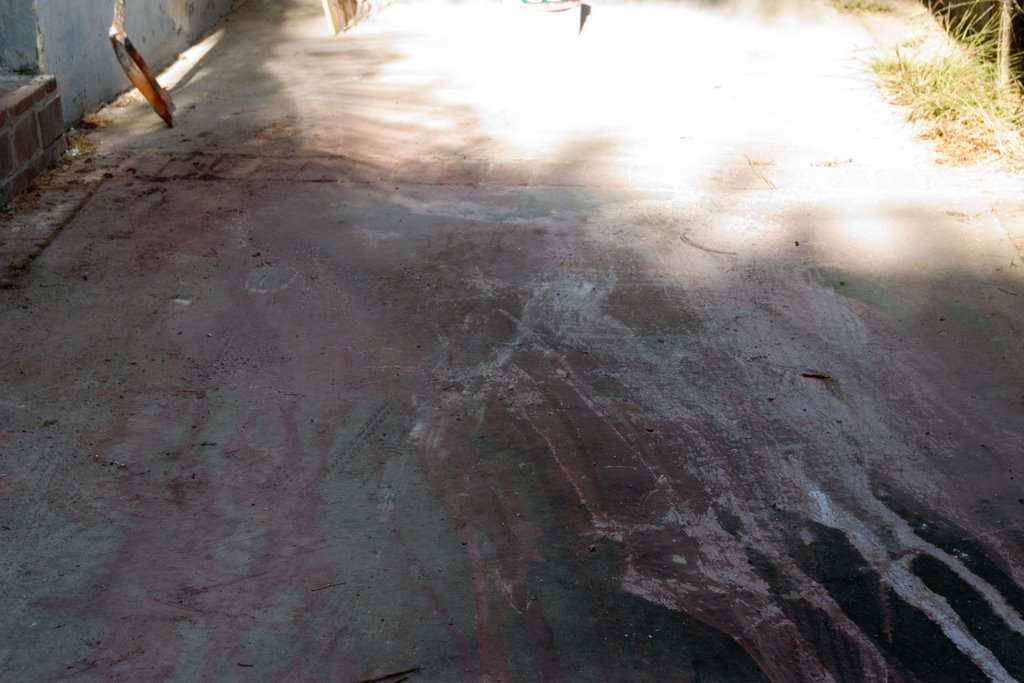
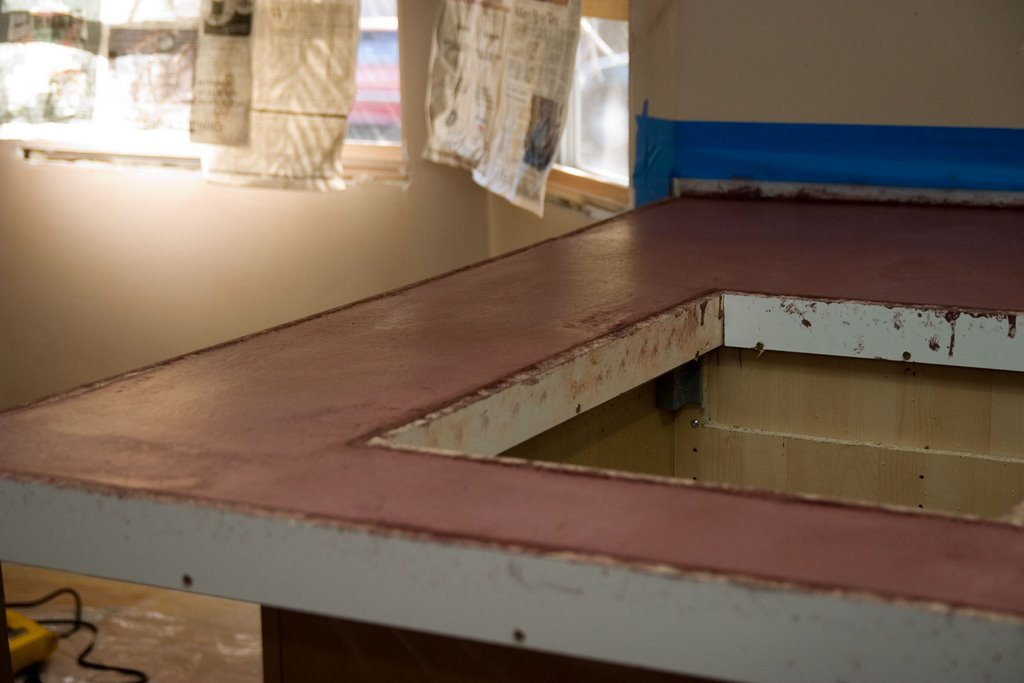
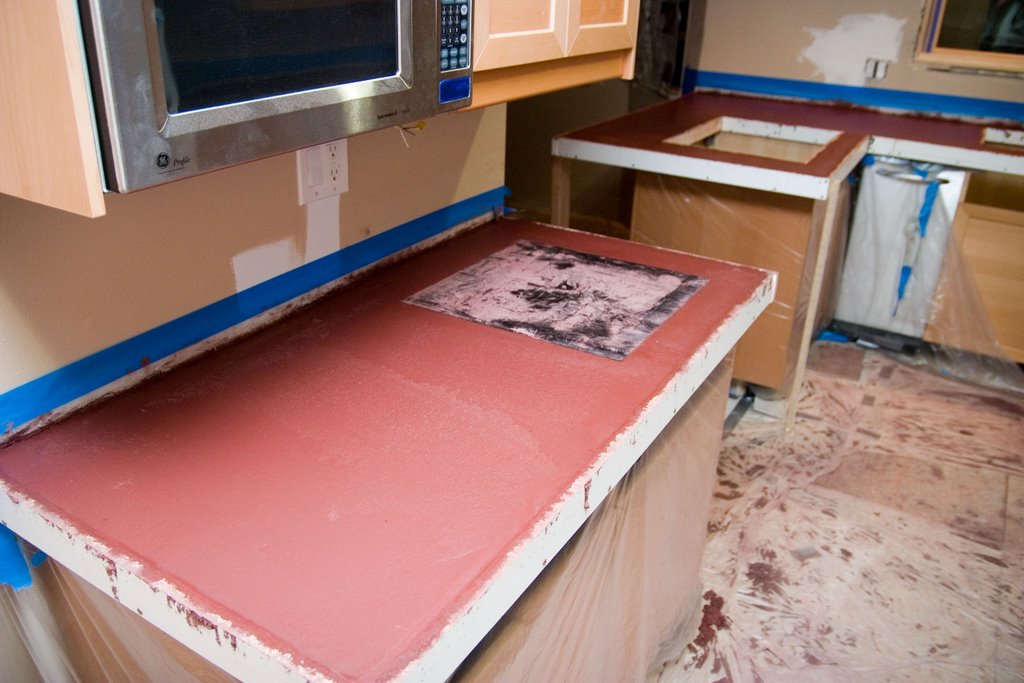
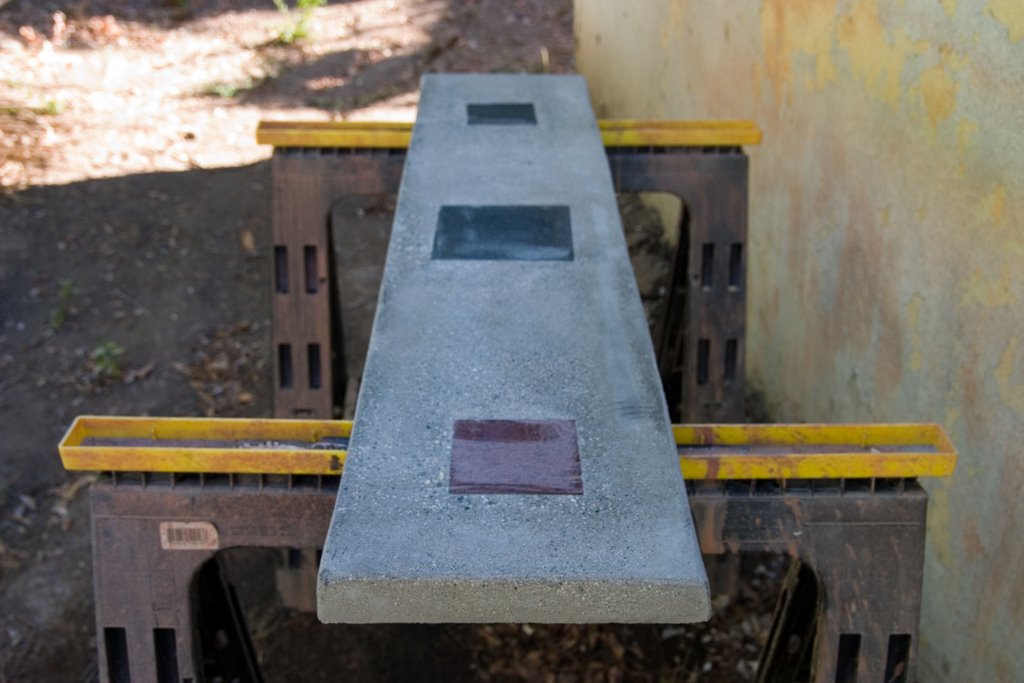
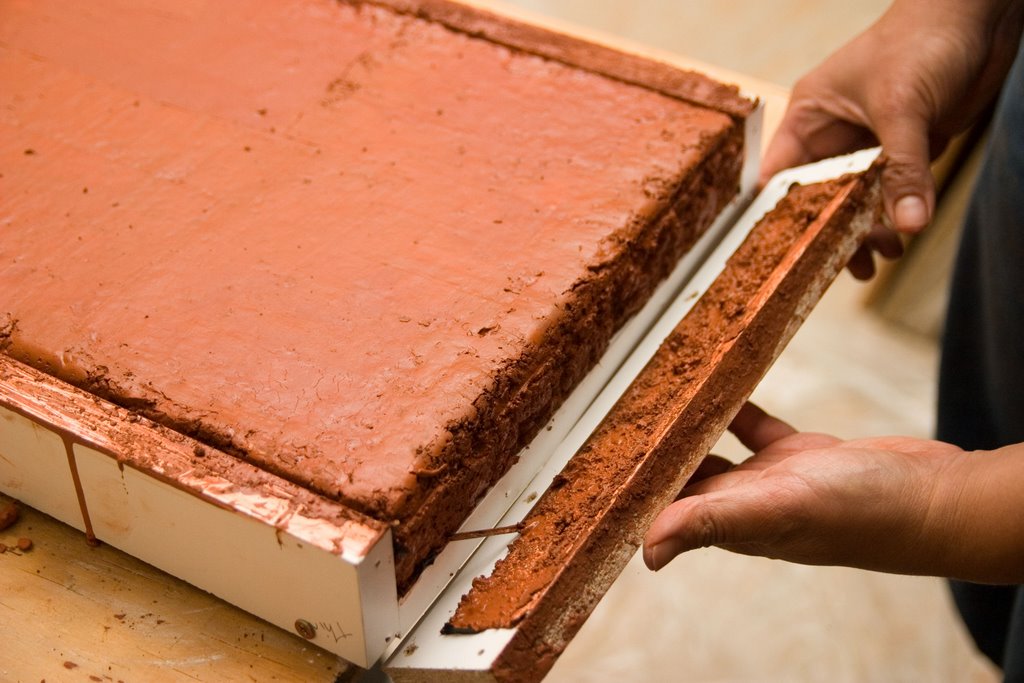
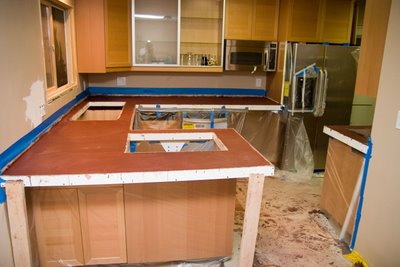
Here is the finished product. It will stay in the molds for a few days, then we'll grind and polish. The cutouts are for the cooktop (foreground) and sink (back left).

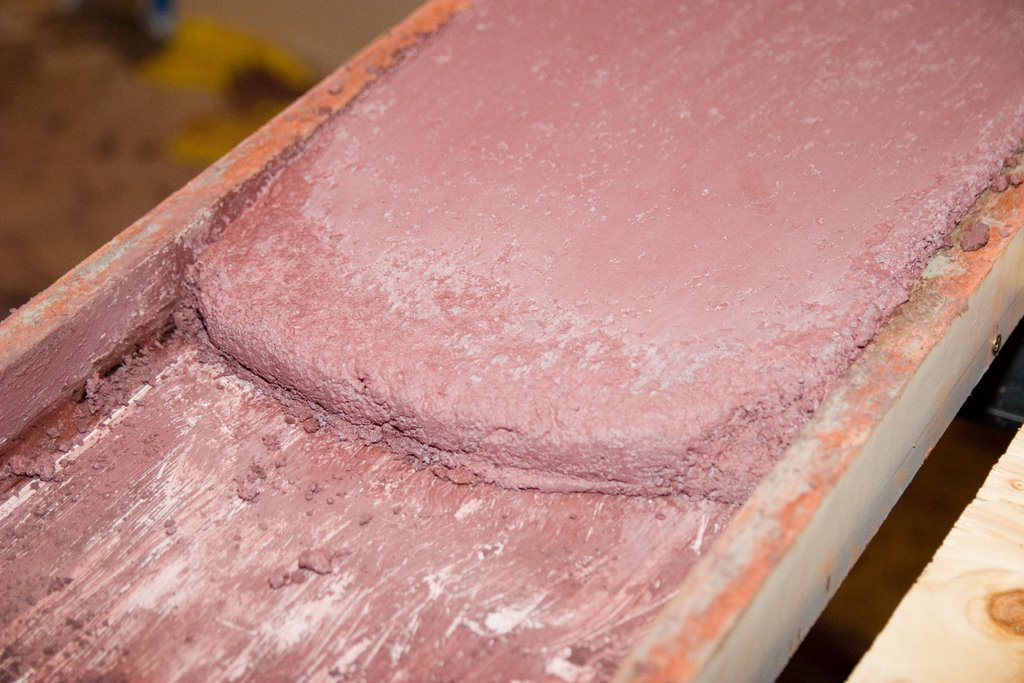
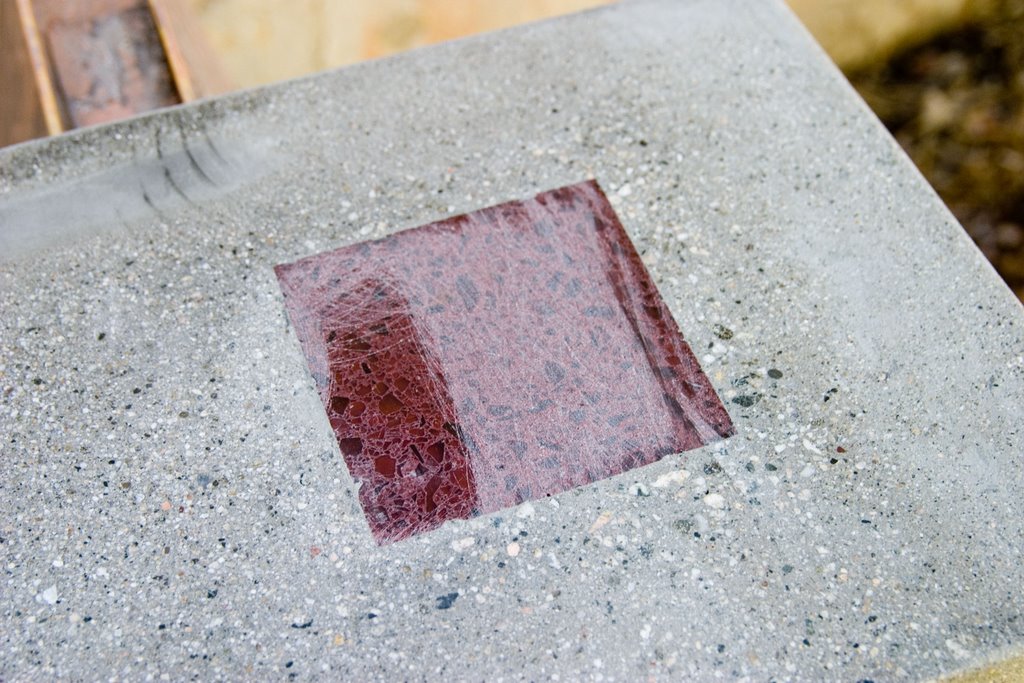
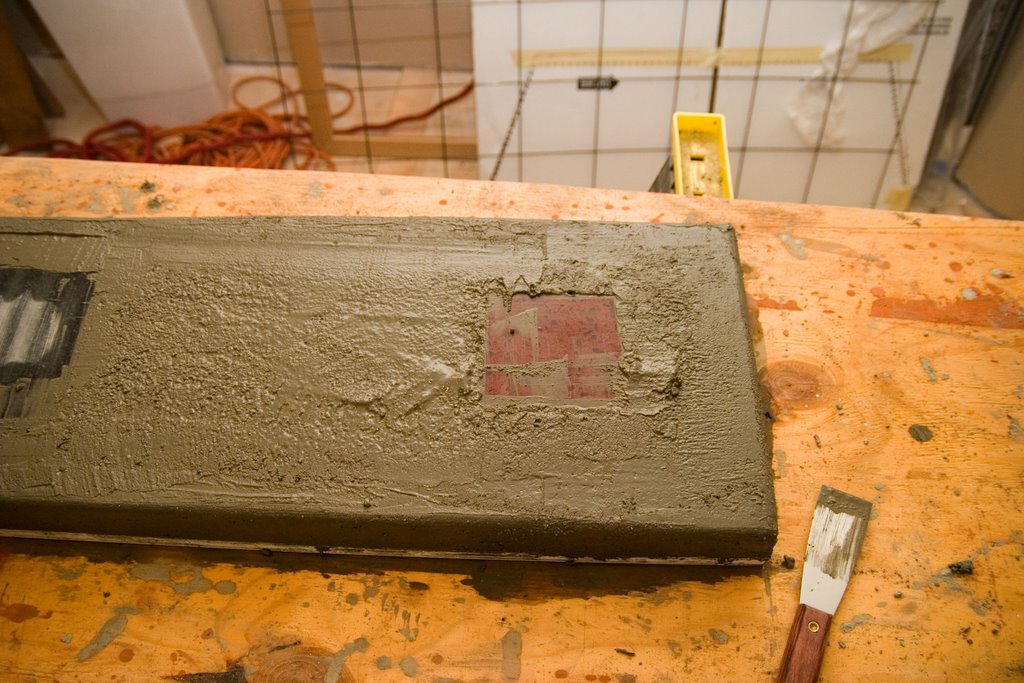
This is the inlaid granite tile. The pinkish film on the top will come off with water.

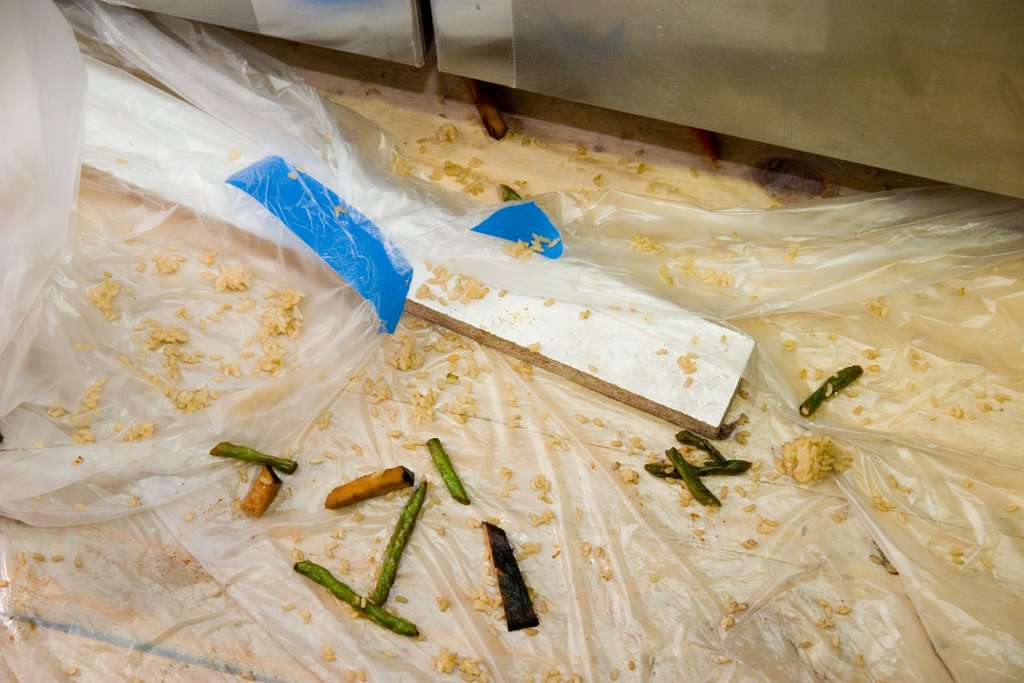
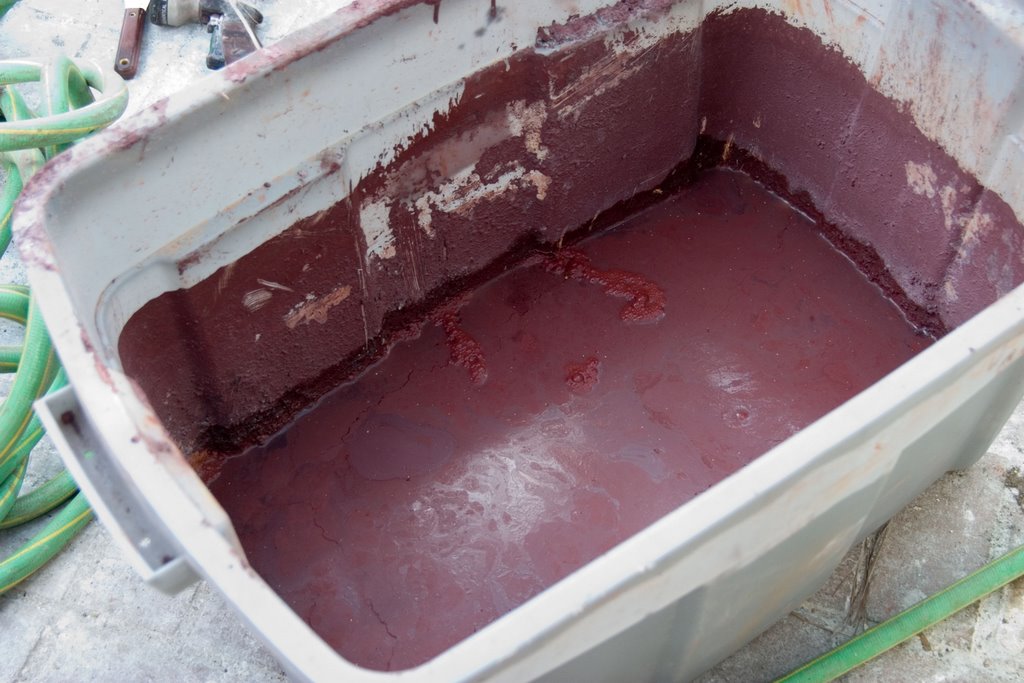
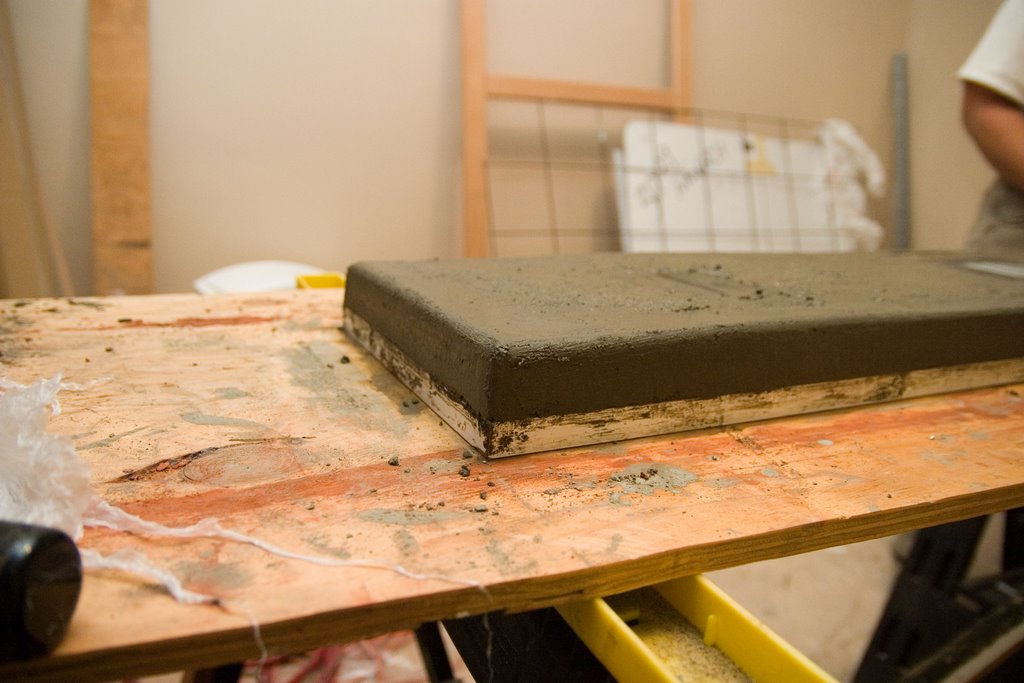
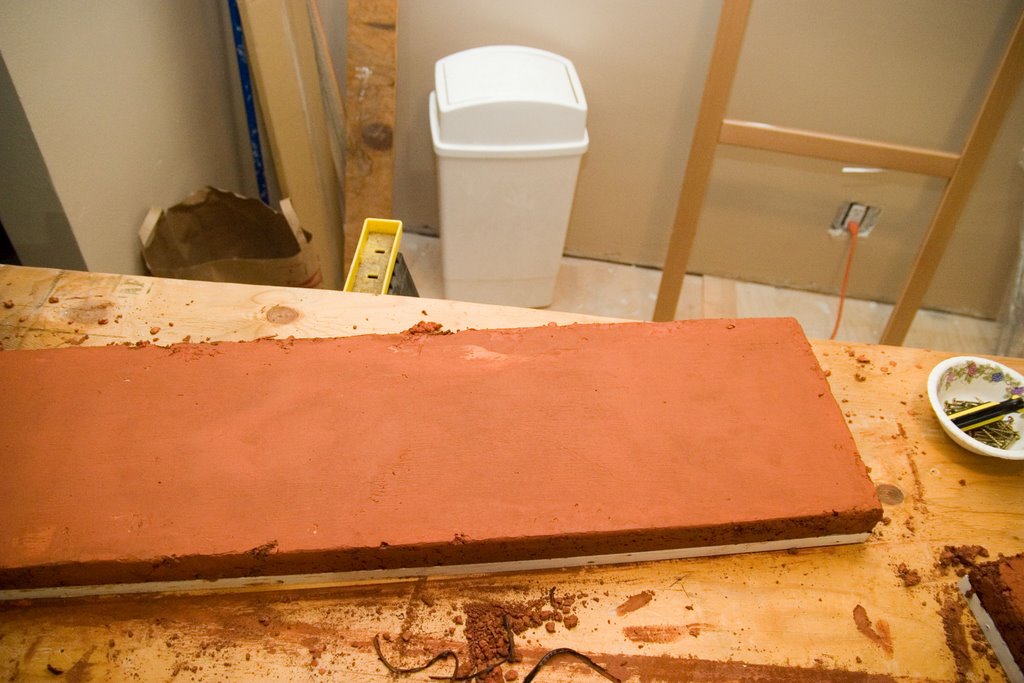
This is a pan of brownies. Only kidding - this is extra concrete which we put in one of the molds we used for samples. It is a great way to have extra concrete on hand for patching (it will be at the same level of dryness that the countertop is) and it will give us a practice piece so we can decide how much to grind.


Saturday, October 21, 2006

12 plus hours of more prep

Today was our fifth 12+ hour day in the last 10. Wow. C and I spent another 12+ hours working on concrete prep. His parents helped us for about 8 hours as well. We started the day by picking up a large rental pickup truck to tow the cement mixer and then we picked up the mixer. We finished the molds and worked on reinforcing the mold with rebar, caulking the mold and tarping the entire area. We really thought we'd be ready first thing this morning. Then the contractor got delayed, but we still thought we'd be ready. Then we thought we could finish by 1:00 or so, then we thought 2:00. Then I was thinking 4:00. Then I was wondering if we could get to it at all today. The time just flies by, and everything takes so long. You look at the clock, and half an hour passes and you've gotten one (of many) pieces of rebar in. Adding to the pressure was the fact that we are only permitted to do work on the house (like running a large, gas-powered cement mixer) until 5:00 on Saturdays.

By the time we quit, it was about 9:00 p.m. and we still weren't ready. Ugh. I sort of wanted to push through just to get it overwith and so we could have a day off tomorrow. But, we did the smart thing and waited. I also thought we'd be pushing our luck with the neighbors, who have been very understanding, by running the mixer late at night. Pouring the concrete takes so much patience and you just can't rush it. Starting late at night when you are exhausted and incoherent just isn't a good idea. So I was really bummed out that we had to do it Sunday. Fortunately, C's parents were available to help.

Friday, October 20, 2006

39 person hours of mold building

Today the contractor C and I spent 13 hours working on building the molds. You just wouldn't believe how long it takes. I totally understand why concrete countertops are so expensive. The material is cheap, it's the labor that makes it costly. Every little thing took forever - each piece had to be cut precisely, the corners squared, everything level, etc.

We had hoped to be ready to pour by the end of tonight but that didn't happen. We hope to be ready sometime early afternoon tomorrow. We were both exhausted and incoherent at the end of the night. We went to be around 2 a.m.

Here is a shot of the plywood substrate.


Here is another shot of the plywood.

Here is the partially built mold. We used white melamine because it won't stick to the concrete.


On top of the plywood is cement board. It has brand names such as Durock or Hardiboard. It is not really needed as a structural element in our case - it is mainly so that the concrete adheres properly since it won't adhere to wood. The cement board is rectangular, and appears in this picture as slightly greyish compared to the white melamine.


Thursday, October 19, 2006

Ground and polished second sample

Today's major tasks were grinding and polishing the second countertop sample and doing a big Home Depot run in anticipation of pouring the countertops on Saturday. I'm really feeling the pressure - this HAS to happen this weekend or we risk having our permit expire. If it expires, we have to file for an extension, which may or may not be granted and we also have to pay a large fee. It will be a whole additional set of headaches we don't want! We've had too many late nights, long days and backbreaking work. I'm really tired and sore, my body is battered and my mind is fizzling. We've hardly had any time off in three weeks. Hopefully we can get a little breather if the countertops go well this afternoon.

The contractor was supposed to be here today with a helper, and we were going to work on mold building. Unfortunately, he wasn't able to make it so we are delayed until tomorrow on the mold building. I'm nervous because it only gives us one day to prepare for the pour on Saturday.

Here is the second sample we did. We just used plain grey premixed concrete in a bag. We wanted to practice doing inlays, using a cement mixer and troweling. The three squares are granite tile samples we had from our research. The are embedded in the wet concrete and the edges should be flush with the countertop. I like the way they look, but they are really challenging.


Here is a shot that shows the sheen of the polished concrete. It is exciting to me that I was able to get such a nice finish on plain concrete with no additives that enhance the product. This was kind of a bad mix - it was way too wet. But even with that, it still came out well.

Here is a shot of one of the inlays. The concrete was mounded around it a bit, and I scratched the granite while polishing the concrete down. Granite is really hard, but the diamond polishing pad will scratch it.


Wednesday, October 18, 2006

Ground and polished first sample

Today I used the grinder that arrived yesterday to grind and polish the first sample. It is good to get a few practice runs in so that I can learn to use the tool, see how messy it is and see how various amounts of grinding look. The troweling gives the surface a smooth, mottled look. Grinding actually takes away material and exposes the aggregate (pebbles) in the concrete mix. It also removes the troweling marks and mutes the color to a more greyish tone. When we were shopping for supplies at Home Depot, we were surprised to see knee-high rubber boots in the concrete section. After griding, I know why they are there! The grinder is a wet grinder, meaning it sprays water as you grind (the grinder is like a big, powerful rotary sander). I bought a big heavy plastic apron the wear that came to my ankles (I'm only 5'3"). The water sprayed on the front of me and rolled right down to my feet. A lot of water. The lower part of my pants and my shoes were soaked. My shoes took 3 days to dry out in very dry weather. I was sloshing around all over the place with water spilling our with every step. I also found out that people use the boots when they have to walk into large pours - like a patio or foundation slab.

I'm very happy with how this sample turned out - it's going to be hard to decide which look I like best. I love the feel of it - it's very tactile. I could picture people standing by the countertop and idly running their hands over it. I certainly will be doing a lot of this!

Here is a shot showing the effects of grinding. On the right, I ground away more material. The color is a little more greyish, and more aggregate shows. On the left, I ground away less material. The color is a brighter, more orange shade and very little aggregate is visible. You can also see the mottled color cause by the troweling.


This is the end where I ground away a lot of material. This effect is called terrazzo. These pebbles came in the concrete mix, but you can use decorative stones in combination with these or instead of.


Here is a shot of the concrete with very little grinding. The color is very intense, and just a few small grains of aggregate are visible. The troweling pushes down the aggregate, so the more you grind the more you expose. The mottled color caused by troweling is also visible. I really like the variations in the color. The small holes are caused by air bubbles and can be fixed with a mix called slurry. It mixes to the consistency of toothpaste and you smooth it on and remove it with a squeegie.


Tuesday, October 17, 2006

Trying to find a mixer

DIY projects are should be called "BTS" (behind the scenes) or "AOT" (ahead of time). Like an iceberg, the nailing, assembling, creating (i.e. what you see on home improvement tv shows) is small portion of work (and by far the most fun). Most of the work happens before you actually make anything and I think the success of the project is largely determined by the prep.

Today spent several hours on the phone and computer trying to decide which mixer to rent. A critical question - it must be big enough. It's not as easy as it sounds. There is the drum capacity, which tells how much it would hold if you filled it with water and stood it on end. Then there is the mixing capacity which tells how much material you can actually mix in it. This is smaller than the drum capacity. I must be the only person that asks how much concrete the mixer holds because I spoke to several people at three different rental places and the had little or no information on this. When they had a figure, they were unable to tell me if it was drum or mix capacity. Also, they sometimes tell you how many bags it will hold. This is useless because there are bags in 60 (1/2 cubic feet), 80 (2/3 cubic feet), and 90 (3/4 cubic feet) pounds, and there is a measure called a sac used in the construction industry which as best as I can ascertain is about 10 cubic feet. To further complicate matters, the mixing capacity can be measured in liters as well.

I don't understand how people can get the correct mixer without having this information. Our whole job has been fueled by our cubic feet calculation. It was almost the first thing we figured out. I finally decided to go this route when one of the rental people was telling me a 9 cubic foot mixer holds 2 6o pound bags of concrete. Ok, here's how far off he was - the mixer in question will mix 9 cubic feet of concrete. 2 60 pound bags together is 1 cubic foot. I kept asking the question in numerous ways, and he was just clueless.

I ended up calling the rental places and asking for the model numbers of their rental units. The manufacturers usually have pretty good information on their websites. I was absolutely hung up on one mixer though - couldn't make heads or tails of the figures until I figures out they had a typo on the website (they had the information for the next smaller size mixer on the one I was looking at).

The grinder we ordered got here today, and the plan was I was going to grind the first sample we did today. Unfortunately, it got here too late in the day so I'll have to do it first thing tomorrow.

Monday, October 16, 2006

Running around for concrete today

Since we are on a tight time frame, I worked on getting a piece of tile to use as an inlay today. Even though we are not sure we can actually use it, I had to get prepared today because sometimes these things need to be special ordered, and it might take a few tries to find the right thing.

I originally wanted some marble surface in the kitchen. Marble is supposed to be the best for any kind of dough because it keeps itself cold. But realistically, I wouldn't even use such a surface more than a few times a year. Marble is pourous and can stain easily, so the trade-off didn't seem worth it. We decided to go with a granite inlay - granite comes in nice smooth, pre-finished tiles in sizes up to 24"x24" and they are not too thick. After talking to someone in the first tile store, I found out polished porcelan would work too. I prefer granite though because it is really hard.

The day was spent with an early run to Home Depot to return the mixer, followed by several hours of driving around to tile stores and then a late run to Home Depot to return the extension cord that I had forgotten in the morning.

It was worth it though - we ended up with an inexpensive piece of black granite in a color called Black Galaxy. It has copper colored shiny flecks throughout it and I think it will look great.

Sunday, October 15, 2006

Out third 12-hour day in five days

Today was our third 12-hour day in the last 5. C took off from work Wed-Fri - some vacation eh?

We decided to do another practice run with the concrete. Our first try was good, but not great. We thought we knew how to fix our errors, but thought it was a good idea to practice those fixes first and try to get a sample right before the "big pour."

We prepped out work area by cleaning up all the mess and debris from the prior pour and moved the slabs into the backyard. We vacuumed and put down fresh tarps, then cleaned and reassembled one of our molds. We also spent about an hour talking logistics - concrete is complicated, believe it or not! We have to arrange mixer(s) - if we get a small one it can fit in my car, but then we need two and have to do multiple batches. We're concerned that the first batch will set up before the last batch is done. If we get a big one, we need to rent a truck and tow it. We also have to arrange to have help - there is way too much concrete for two people to handle. It has to be worked into the mold with gloved hands and vibrated by tapping the mold with a hammer. Then it has to be troweled for about 3 hours. Today we were debating the merits of pouring in place (very messy in the kitchen) vs. building a mold in the backyard (makes large slabs to carry inside and the counter will have seams).

We made our requisite Home Depot run and picked up the mixer. We got home and began to run the mixer after creating the rebar reinforcement for the mold. We followed the advice of our do-it-yourself-concrete-countertop guru Fu-Tung Cheng (www.concreteexchange.com) and put the dry ingredients in first. Big mistake! Like making a cake, the dry ingredients caked hard onto the bottom of the mixer once we added the water. It wasn't actually mixing, the mixer was just rotating with a solid block at the bottom. We had to chip the material off the bottom of the mold with a shovel and added way more water than we should have. Next time we'll follow the advice on the mixer and add the water first!

The concrete took over 20 minutes to mix - this was a bad sign since it should have taken 8-12. But it was nice and wet compared to our too-dry mix of the previous try. It went easily into the mold and we worked it in and vibrated it. As we worked the concrete, we found out why you shouldn't add more than the recommended amount of water. In addition to making the concrete weaker, it takes forever to dry! We were toweling water off the top as it dried, and I finished troweling over 5 hours later at just after midnight. It should take about 3 1/2 hours to get to this point. (Follow up note: The concrete from this pour is still drying out on Tuesday morning). We also experimented with adding granite tile inlays. I had gotten these as samples, and we are hoping to add a large one in as a dough work surface, for decoration and for the "wow" factor. The inlays made the troweling more difficult, and we won't know for sure if we can use them until we can grind and polish and see if we got a nice flat surface with the inlay flush.

When we finally finished, I was completely exhausted!

Here is the slab after the final troweling is almost done. I think it looks pretty good! The edges are much better this time, and I learned a lot about troweling after doing it for 5 hours.

Here are the inlays we tried. We'll see how well they turn out after grinding and polishing!

Saturday, October 14, 2006

Concrete recovery

Today we spent several hours putting the house back together post-concrete. The place was really torn up and there were tools scattered all over. Back to it tomorrow!

Friday, October 13, 2006

More concrete

We were realllllllly tired today after two long, very physical days. We spent 3 hours ordering the dye and grinding tool and researching mixers. In the evening, we watched the instructional dvd we purchased. It arrived yesterday afternoon while we were doing our samples, but I didn't check the mail until very late at night. If only it had shown up earlier!

Thursday, October 12, 2006

Concrete countertop samples, day 2

Today was the dress rehearsal, and I finally have pictures of concrete to post!

It was a grueling 11 hour day. The concrete has to set for about half an hour, and then you have to trowel continuously until it is completely hard. We finished troweling at 11:30 p.m. We started the day by cutting the rest of the melamine and making our molds. The concrete mixing was problematic - we put the dry ingredients first according to our instructions and if you've ever made a cake you know what happened when we added the wet. The dry caked to the bottom rock solid. We had to chip it out with a shovel. We also couldn't get a good mix because we were trying to mix it by hand with a powerful drill and a mixing paddle. It just wasn't strong enough. The mix was too dry and crumbly.


After making the mold (we used melamine because it won't leach water from the concrete) we had to caulk it so it was watertight and so that the concrete wouldn't leak.

We reinforced the concrete with rebar, shown below. We used wire to bind more rebar to these pieces to fill the gaps, and then filled in the rebar with remesh ( a mesh of pencil thin rebar in a 6" grid).


Here are the dry ingredients, mixed up and waiting for water.


Here is some of the red dye we used.

After the concrete sets for about half an hour, it will hold it's shape and you can carefully remove the mold.


Here are the finished pieces after 2-plus hours of troweling. The edges are crumbly due to our bad mix.


Here is the surface of the sample. This would be the countertop if we had been actually building them. You can grind (like rough sandpaper) and polish (like fine sandpaper) to smooth and flatten the finish. If you grind enough, the pebbles (aggregate) in the concrete will show up and it will have a terrazzo look.


Wednesday, October 11, 2006

Concrete countertop samples, day 1

C and I decided to do a sample run of the concrete countertop before attempting to do the real thing. One thing we're learning about DIY projects is that they take way longer than you think. Try adding at least one zero to however many hours, days, weeks you estimate. A lot of the time is prep - research (lots!), tool research and buying, assembling, and general learning curve time. Our time isn't very efficient either right now due to the general chaos in which we are living. We were aiming to try our first pour on Saturday, and that didn't happen (too much time buying tools and materials at Home Depot). We felt that today was the day!

The prep for this project included about 15 hours of research on DIY sites, several hours on the www.concreteexchange.com site, 2 hours putting together a shopping list, 2 trips to Home Depot of 4 hours each, an hour or so to unload the car and heavy bags of concrete, one trip to the local hardware store, and one trip to the thrift store.

We started today by assembling the table saw we purchased to make our molds. It took 5 hours! The diagram was mislabeled (two number 7 parts, no number 9) and we spent some time looking for scres that according to the instructions was in the hardware bag. The screws turned out to be already attached to the saw. There were parts referenced in the instructions which were not described or defined anywhere. There were numerous adjustments to be made (making the cut angles range from 0 degrees to 45 degrees and making the blade plumb to start). Not only were there no instructions on how to do these critical adjustments, they weren't even mentioned. How do they expect people to be able to do a decent project if the blade isn't even straight? I generally have no trouble assembling things, but this was really poorly designed and there were many mistakes in the instructions.

We finally got the saw assembled, and were ready to make a test cut. We plugged the saw in and flipped the switch and POP! The saw made a loud noise followed by a puff of smoke and a burning smell. Not good! It blew the circuit. We went outside to flip the breaker, and couldn't find the living room breaker. We did figure it out because it was the only one in a different position than the others. We flipped it and nothing happened. Now we're getting worried that we've damaged both the saw and the electric in the house. A call to the electrician went to his voicemail.

We finally got the circuit back on after a phone call to C's dad. The breaker has to be flipped to the "off" position before turning it back on to get it to work again. That's what we didn't know - we were just flipping it from tripped to on. We tried the saw again with the same results, but at least we knew how to get the circuit back on. We decided to try it out in the garage, where eveything worked fine. We still couldn't figure out why the breaker was tripping - the saw was only 13 amps, and the circuit was 20. There was only a few lightbulbs plugged into it. The electrician called back, and explained that the living room is on the same circuit as one of the bedrooms. Code requires bedrooms to have an AFCI (Arc Fault Circuit Interupter) circuit. This is an especially sensitive circuit that will shut off with any power surge of even a few milliseconds. The saw can have a split-second power surge of 30-40 amps when it powers up. This explains the breaker tripping! The reason it worked in the garage is that the garage has GFCI breakers (Ground Fault Circuit Interupter) which are less sensitive. These are the same type breakers found in bathrooms and kitchens due to being near water. (I know, more than you ever wanted to know!!!)

It was so late in the day by that time we were only able to do 4 cuts before I had to leave for a prior committment. So, no pour today either! But tomorrow for sure, I think.

On another note, the store where we purchased our washer and dryer sent a tech out to look at the leak (see entry for this past Saturday). Turns out their installers used the wrong tool and damaged the connector to the washer. They are handling it at their expense. It is a pleasure to see someone handle something responsibly.

Saturday, October 07, 2006

more concrete prep

We spent a few hours today planning for the concrete, and then went to Home Depot tonight. Saturday nights are a great night to shop there. We used to have a life before buying a fixer upper. On our way there, a quick stop at Radio Shack turned into 45 minutes (C was buying stuff for the home wiring).

We did manage to get everything we need for concrete, but obviously won't get to pour it today. We have plans tomorrow, so we will have to wait until Wednesday when C is off from work. When we finally got home from Home Depot, there was a really rapid dripping sound coming from the wall where all the bathroom plumbing is. Oh no! This is one of the worst things to hear in a house. We figured it might be the newly-installed washer and dryer so we after pulling out those behemoths, we spent an hour trying to find the source of the leak. Turns out one of the hoses was leaking where it connected to the washer. We shut the water off and cleaned up the water and put a fan on. Hopefully there will be no damage - there was a lot of water for a long time (I first thought I heard a drip three days ago but couldn't find it). This was not fun to do at midnight on a Saturday night. I was really glad I watched the installation because it was helpful in finding the problem. We were so thankful it wasn't plumbing!

One of the things that has been somewhat stressful is buying so much. Every project we take on requires new tools. I shop several times a week, and I don't even like shopping. Even if I did, this would not be fun shopping. It's draining, analytical, time consuming unfun shopping. We also have no place to put anything since the garage is holding most of our stuff. I haven't been able to put any shelves or storage in there so everything just lays around. Some things are in completely illogical places, but we keep them there because we know where they are. For example, a bunch of our frequently used small tools are in a paper shopping bag in the master bedroom. They've been there for months. This makes absolutely no sense, but it does work so we keep them there. I think over time future DIY projects will be easier as I get "tooled up." I hate the idea of owning so much and dread seeing a full garage, but you really need to have a lot of stuff to tackle home projects. Sometimes you can do it with less, but it usually makes the job harder. At least the amount of shopping I'll have to do will decline with future projects.

Friday, October 06, 2006

heating system and concrete prep

The plumber was here today finishing the heating system and being a complete jerk. He was rude, condescending and verbally abusive to me. He has been doing the job in small blocks of time at his request (e.g. Can I come over for an hour?) and then blames me because it is an inconvenience to him. He is really a horrible person in addition to being a bad plumber. I've been pretty lucky though, he's the only bad egg of everyone I've worked with.

I spent 4 hours at Home Depot this evening getting ready for pouring a sample of the concrete countertop. I wasn't able to finish, so we'll have to go back again tomorrow.

Tuesday, October 03, 2006

Another day of lots of small progress

I made a little bit of progress on a lot of different things today. I was ready to put trim on the first window, and found I didn't have the proper connector to connect the compressor to the nail gun. This meant a trip to the close-by hardware store, which didn't have what I needed and then one of my several-times-a-week to the dreaded Home Depot. My day was a bit delayed by the fact that I had to take my car for servicing and pick it up and the plumber called me last minute wanting to come and do some work. Not wanting to pass up the opportunity, I said come on over and changed my day around. It was worth it, but I did get less done than I wanted.

Here is our nice, new, programmable thermostat. We tested it out today, and the new heater definitely works - it was pumping out hot air! It was really cool to see this come together. When we bought the house, there was the original 1952 heater under the house. It was a rusted wreck! We have a brand new unit installed in the attic (for much easier access), and now it actually works.


Monday, October 02, 2006

An encouraging comment

C made an interesting comment today. He said the place is starting to feel more like home and that he like seeing more of his stuff in places where it belongs. Yay!

Sunday, October 01, 2006

Busy Sunday

For the second weekend in a row, we worked on the house both days and didn't get out for any fun. Not good! We did get a lot done today. C worked on the television set up, and I worked on the closet set up. Since we only have two closets, one of which is only 4 1/2 feet wide, we need to maximize the storage in each. Also, in our bedroom there won't be room for a king sized bed and dressers, so all of our clothes have to go in the closet. Today I did some measuring and calculating for the closet system. For example, one of my drawers takes up about 1400 cubic inches of space, so in the new system I will need about that much space for the items in that drawer. I was comparing the size of our current drawers to the size in the new system. Also, I was trying to figure out how to combine hanging and drawer storage and how to hang two rows on top of each other. I went out late this afternoon to look at hampers and measure them to see how they will fit into the closet. Not only is there not much room for a hamper out in the room, both C and I love contemporary, uncluttered clean lines. My goal for the bedroom is to have only the bed and two nightstands and nothing more.